import React, {useState} from 'react';
import { StyleSheet, Text, View, TextInput, Button } from 'react-native';

export default function App() {
  return (
    <View style={{padding: 50}}>
      <View style={{flexDirection:'row', justifyContent:'space-between', alignItems:'center'}}>
        <TextInput
          placeholder="Add your Bucket list"
          style={{ width:'80%', borderColor: 'black', borderWidth: 1 }}
        />
        <Button title ="ADD" />
      </View>
      <View>

      </View>
    </View>
  );
}

const styles = StyleSheet.create({

});
View에 padding 을 추가하게되면 padding이 없을때 상단바에 가려서 보이지 않았던 InputText가 padding으로 인해 내려와 보이게된다.
View에서 padding 과 같이 설정가능한 값들은 https://facebook.github.io/react-native/docs/components-and-apis 웹페이지에서 전부 확인이 가능하다.
react native는 기본으로 flexbox을 이용해서 view의 위치나 정렬등을 설정할 수 있다. flexbox은 css에서 레이아웃을 잡는 방법인데 react native에서도 사용이 가능하다.
View style에 flexDirection 요소를 통해서 가로로 요소를 배치할지 세로로 배치할지 설정할 수 있다. row의 경우 가로로 배치되고 아무것도 설정안할경우 기본값은 세로이다.
justyifyContent값을 통해서 각 요소 사이의 공백을 어떻게 설정할지 또한 설정 가능하다. space-between의 경우 각 요소는 양끝에 사이에 공백을 두고 배치되게 된다.
TextInput과 같은 경우는 위의 전체 테두리로 표시되지만, 하단의 코드처럼 하단에만 테투리가 표시될 수 있도록 설정이 가능하다.
        <TextInput
          placeholder="Add your Bucket list"
          style={{ borderBottomColor: 'black', borderBottomWidth: 1 }}
        />
width가 80%인 경우는 부모 view의 80%만큼의 크기 만큼 가로길이가 된다는 뜻.
import React from 'react';
import { Text, View } from 'react-native';

export default function App() {
  return (
    <View style={{padding: 50 }}>
      <View
        style={{
          backgroundColor: 'red',
          width: 100,
          height: 100,
          justifyContent: 'center',
          alignItems: 'center'
        }}
      >
        <Text>1</Text>
      </View>
      <View
        style={{
          backgroundColor: 'green',
          width: 100,
          height: 100,
          justifyContent: 'center',
          alignItems: 'center'
        }}
      >
        <Text>2</Text>
      </View>
      <View
        style={{
          backgroundColor: 'blue',
          width: 100,
          height: 100,
          justifyContent: 'center',
          alignItems: 'center'
        }}
      >
        <Text>3</Text>
      </View>
    </View>
  );
}
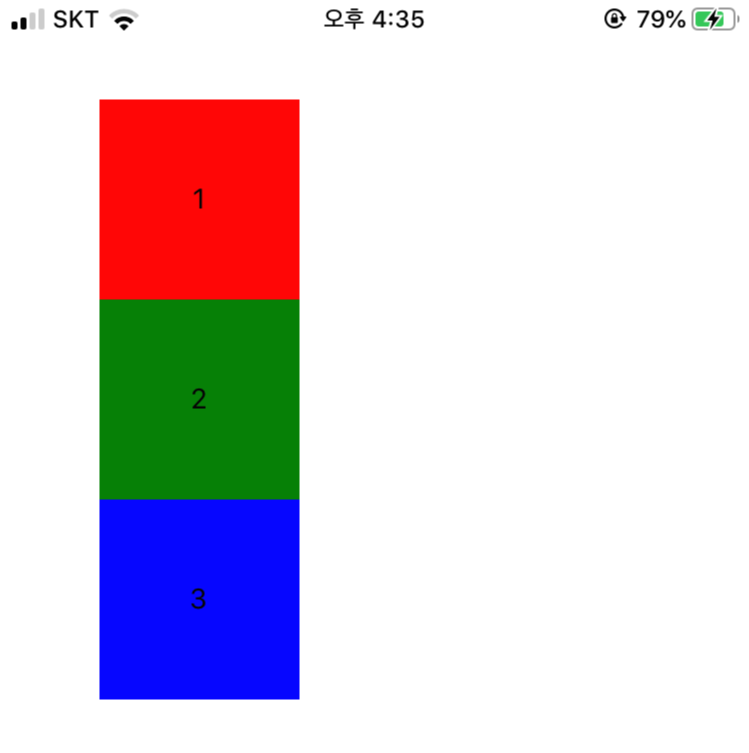
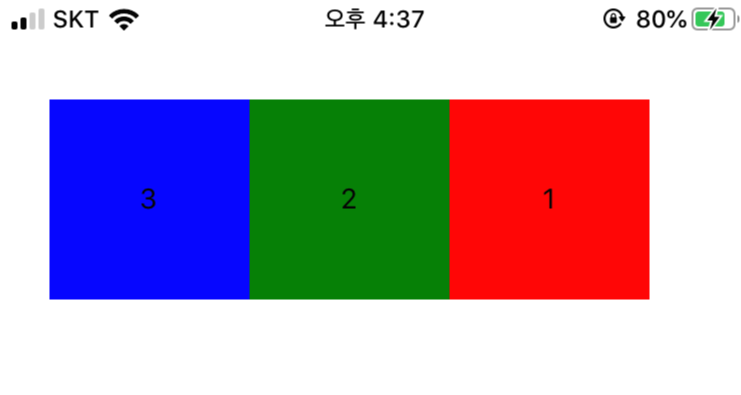
위 코드의 실행결과이다. 이때 View에 아래와 같이 flexDirection에 'row'나 'row-reverse' 값을 넣어주면 결과가 아래 캡쳐와 같이 바뀌게된다.
<View style={{padding: 50, flexDirection: 'row-reverse' }}>
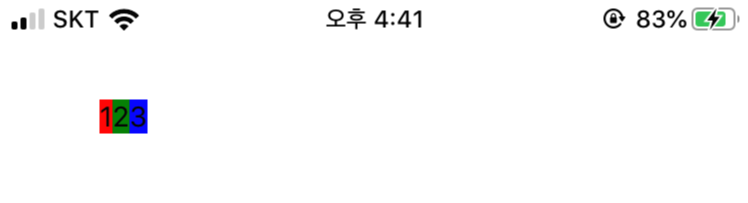
이때 각 box의 View에서 width와 height값을 지우게되면 아래와 같이 box들이 매우 작아진것을 확인할 수 있다. heigth와 width값을 삭제하면 안의 내부 요소의 크기만큼의 box크기가 설정되기 때문에 숫자 1,2,3 크기만큼으로 box크기가 변경된 것이다.
flexbox main access은 왼쪽에서 오른쪽 세로는 위에서 아래인데 이게 변경되게되면 뭐 main인것에 따라 바뀌고 안바뀐다는데 아직 먼소린지 잘모르겠음 ㅠ 공부하자...
flex요소는 flexbox내부의 요소들을 사용한다. flex 요소는 숫자값이다.
만약 한 요소에만 flex값에 1을 주면 이 값을 가진 요소는 최대한 많이 가질 수 있는 크기만큼 크기가 증가하게 된다. 이 숫자는 상대적인 값이다. 두요소에 상대적인 비율값을 주어서 크기를 조정 가능하다.
      <View
        style={{
          backgroundColor: 'red',
          flex: 1,
          justifyContent: 'center',
          alignItems: 'center'
        }}
      >
        <Text>1</Text>
      </View>
      <View
        style={{
          backgroundColor: 'green',
          flex: 2,
          justifyContent: 'center',
          alignItems: 'center'
        }}
      >
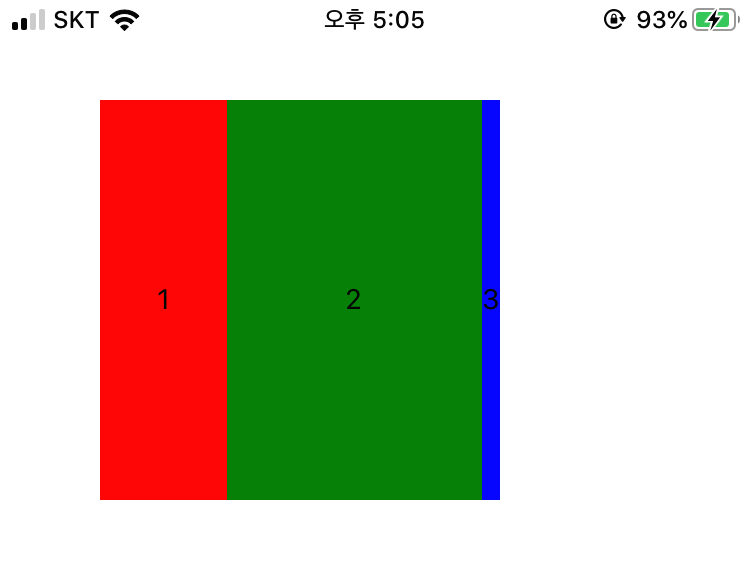
위의 코드에 따른 위의 캡쳐의 내용과같이 red에는 1, green에는 2을 줬을때 green은 red의 두배의 가로크기를 차지하는 것을 확인할 수 있다. blue에는 아무값을 주지않아서 최소값이고 최소값을 제외한 나머지값을 red 와 green이 가지는 것을 확인할 수 있다.
스크롤뷰(scroll view)
import { StyleSheet, Text, View, TextInput, Button, ScrollView } from "react-native";ScrollView를 import를 해준다.
다음 View대신에 ScrollView를 사용해주면 스크롤뷰를 사용할 수 있다. 그냥 View를 사용하면 안의 내용이 잘릴 경우 확인할 수 없지만 scroll view는 확인이 가능하다.
FlatList
list의 길이가 길어서 얼마나 길지 모르는 경우에 사용함.
'프로그래밍 > react native' 카테고리의 다른 글
| [React Native] Style (0) | 2019.11.10 |
|---|---|
| [Visual Studio Code] code formatting 줄정리 (0) | 2019.11.03 |
| [React Native] Button(using Hook), View (0) | 2019.10.28 |
| [React Native] What is react native (0) | 2019.10.27 |
| [React Native] 개발환경 설정(install expo, visual studio code) (1) | 2019.10.27 |